Siamese fighting fish are hypersensitive to their surroundings and need to be gently introduced to their new enviorment. That’s why Acclimate aquarium fish is important. If you bring your betta fish home and put him directly into this new tank without acclimating him properly the following can happen.
- Stress
- Severe trauma
- Shock induced death
It’s critical to check the basic parameters including temperature and pH before adding betta fish to their new home.
Beginning the Acclimate aquarium Process
Thins you will need to get your new tank ready:
- Water conditioners
- Thermometer
- Testing supplies
There are a few different situations you may find yourself in.
- Freshly cycled tank– You might have set up an aquarium weeks ago and cycled it to prepare for your new fish.
- Established tank – You may have an established tank already. You will need to quarantine your new fish for the suggested 4 week period before adding him the group.
- 100% Water change – You may have decided to do full 100% water changes and are setting up your aquarium just before the acclimation process.
Note: If you are setting up a new aquarium, it is suggested that you do this 24 hours prior to acclimating your new fish. This will allow for off-gassing (chemicals in gas form are allowed to leave the water).
Steps For Acclimatioaquan
Step 1: Testing the water
The first step in the acclimation process is to test the water parameters of the fish’s bag or cup. Check and record the temperature and pH of this water You can also test the following to see what you are starting with:
- Ammonia
- Nitrite
- Gh
- Kh
Temperature and pH, however, are the most critical information you need from the fishes current water.
Test and record the temperature of the new tank (this is the tank you will release your fish into). If the temperature in the bag varies from that in the tank (even if its slightly different), you will want to float the bag (or betta cup) in the aquarium until the temperatures are the same.
Before you float the betta fish container, test the bag/cup water’s pH level to see if it differs from your aquarium’s pH.
Step 2: Adjusting pH
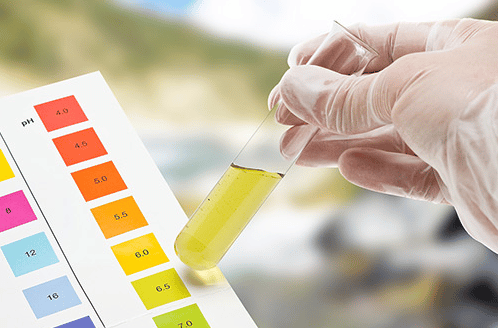
Betta fish like soft water with a pH between 6.0-7.0 the best. They can however adapt to a range of pH level as long as they are consistent and controlled.
If the pH of your tank is different from the water in the bag you will need to take a little more time acclimating the fish rather than altering the pH with chemicals (example: pH UP or pH DOWN). These chemicals tend to make quick harsh changes in the pH. These changes will also revert back just as quickly as they changed.
Note: These rapid fluctuations are highly dangerous than than a stable pH outside of the ideal range.
To bring the pH levels closer, add a small amount of aquarium water to the bag/cup water every 5 to 10 minutes.
Step 3: Floating the Bag or Cup
Once you have tested and conditioned the water you are ready to float the bag/cup that your new fish is in.
- If the bag and your tank water is very close in temperature and pH levels then you should only need to float your fish for about 15 – 20 minutes.
- If the parameters of the water and temperature differ, then longer may be necessary.
- If the pH or other parameters were off then you should take more time to acclimate your betta splendens – for a minimum of a hour and you may need to do this for longer longer.
When the time is up you can slowly release the fish trying to avoid adding dirty bag water to the tank.
Acclimation is Stressful on Your Fish
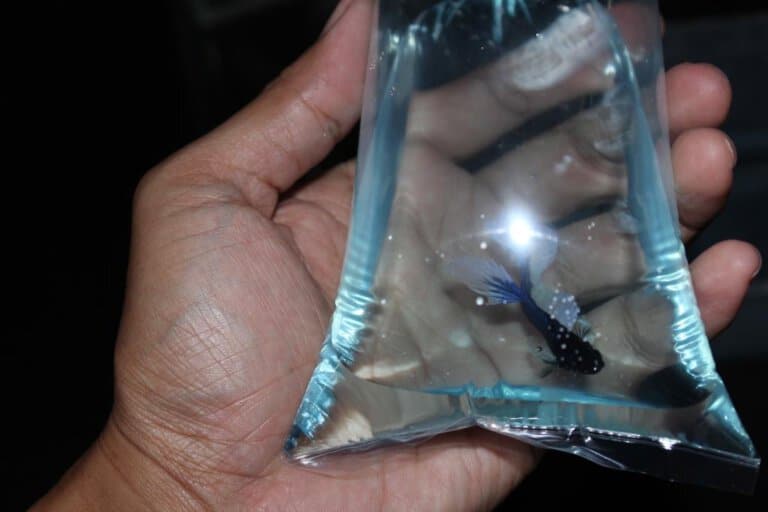
The amount of time needed to acclimate your new fish may vary from 15 minutes to hours.
Remember, the acclimation process can be stressful for even the hardiest of fish.
Stretching the process to an hour or two doesn’t give the fish enough time to adjust properly and you may see signs of stress.
Signs of Stress:
- Dull coloration or gray color
- Sluggishness or Lethargy
- Loss of appetite, disinterest in food
- Uninterested in surroundings
- Clamped finnage, torn, shredded or missing fins
- Bloating, weight loss, bumps, missing scales, open wounds, red streaks
- Red or swollen gills
- Cloudy, protruding or sunken eyes
Be vigilant of your new fish and keep an eye out for signs of stress or disease, especially for the first two weeks after acclimation.
The Drip Acclimation Method
This is another type of acclimation that you can alternatively use to acclimate your fish to its new home. This method utilizes two containers and a piece of airline tubing to acclimate fish slowly and safely.
This method is popular with fish owners who keep more fragile species of fish and is great for bettas also.
Steps for the Drip Acclimation Method
Step 1: What you will need to do this method
You will need the following items for this method:
- Your aquarium
- The container your fish is in (bag, cup, plastic container, etc)
- Piece of airline tubing
Step 2: Preparing
You will need to place your aquarium and the container with your new fish in it close to each other. Make sure there is room in the container to add more water to it. You should have enough space to add at least the same amount of water that is already in the container.
Example: If the container is 50% full you will want to be able to add at least another 50% to the container.
Step 3: Start the Drip Process
You will need a piece of the airline tubing (this is the same tubing you would use for your airstones) make sure this is long enough to reach from your tank to your new fishes container.
- Tie a tight knot somewhere in the middle of the tube.
- Secure one end of the tube in the main tank (your aquarium)
- Create a light suction on the other end (this will start moving the water slowly through the tube)
- Put the other end of the tube in the new fishes container
Note: If sucking on the airline tube to start the dripping process grosses you out your can do the following: Make a tight fist around the end of the tube and suck through your hand. It takes little effort to get the drip to start flowing.
The water should now slowly drip (at a rate of 1 drop per second) from the main tank to the fishes container. If it is dripping faster than this then add more knots in the airline until you get to the rate of 1 drop per second.
Note: This is a siphon which is being fed by gravity. If your betta bag/cup sits higher than the surface of the water in your aquarium, the water will not flow. Make sure your fish container is lower than the water level of your tank.
You will want to take as much time as necessary to match the betta’s water with the new aquarium water. You want at least 50% of the water in the fish container to be from the aquarium.
Note: You will need to keep an eye on the water levels of the fish container with this method or you will overfill the container.
If our article was useful to you You can leaving a 5-star reviews for It’s an encouragement. For us make encourage us in our research. Research information about betta fish for to present useful information further

Also we have group talk about betta fish for sale and share any new tip take care information on Web3 socialFi group

Right now we have betta fish doctor help every bettas lover by top breeder in Thailand to cure or share more tip on Animalverse social
If your bettas fish sick or need tip to treat help or join event prize with AVC Token
Let’s join the group many top breeder will help to answers in betta fish community
More info :
How Good And Bad Is Aquarium Salt For Betta Fish
Benefits Of Tannins Or Blackwater For Bettas.
15 Common Betta Fish Diseases Prevention and Treatment
Disadvantages of Betta Fish Bowls
Best idea for make betta fish tank
All of Betta Fish A Guide on Patterns, Color in the world


